

How To Repair Muffler Pipe
Your vehicle'south exhaust system is made of the exhaust manifold, catalytic converter, resonator, muffler and of grade the pipage to connecting it all together. Throughout the day, your vehicle's exhaust system is constantly being exposed to diverse elements due to mean solar day to twenty-four hour period activities. These include road debris, hot weather, and, if y'all live in colder climates, snow, ice and salt. Prolonged exposure to these conditions can crusade your vehicle'due south exhaust pipe to develop holes and cracks in the system over time.
If you notice that your vehicle is sounding noisier than normal, or if you lot run into black stains indicative of exhaust gases escaping, then chances are that y'all accept an exhaust leak on your hands.The good news is, properly done repairs are relatively like shooting fish in a barrel and last quite a long fourth dimension, saving you money in costly repairs. This is a straightforward repair that should take anywhere from thirty to threescore minutes to perform - and in most cases, the materials needed tin can be found around the house, making it a inexpensive or even complimentary repair.
Part 1 of 1: Repairing your exhaust pipe
Materials Needed
- Gloves
- Flashlight
- Floor jack
- Muffler repair tape
- Condom glasses
- Rubber jack stands x2
- Screwdriver
- Stainless steel hose clamps x2
- Soda can (empty)
- Steel wool
- Tin snips
- Wire castor

Step 1: Raise the vehicle off the ground. Use the flooring jack to raise just the drivers side of the vehicle, keeping the tires on the rider side on the ground.
Secure the unabridged driver'due south side of the vehicle in the air with 2 safety jack stands.
This will requite y'all enough room to move around under your vehicle. If your exhaust is off eye and runs downward the passenger side of the vehicle, merely raise the passenger side instead for a maximum work space.
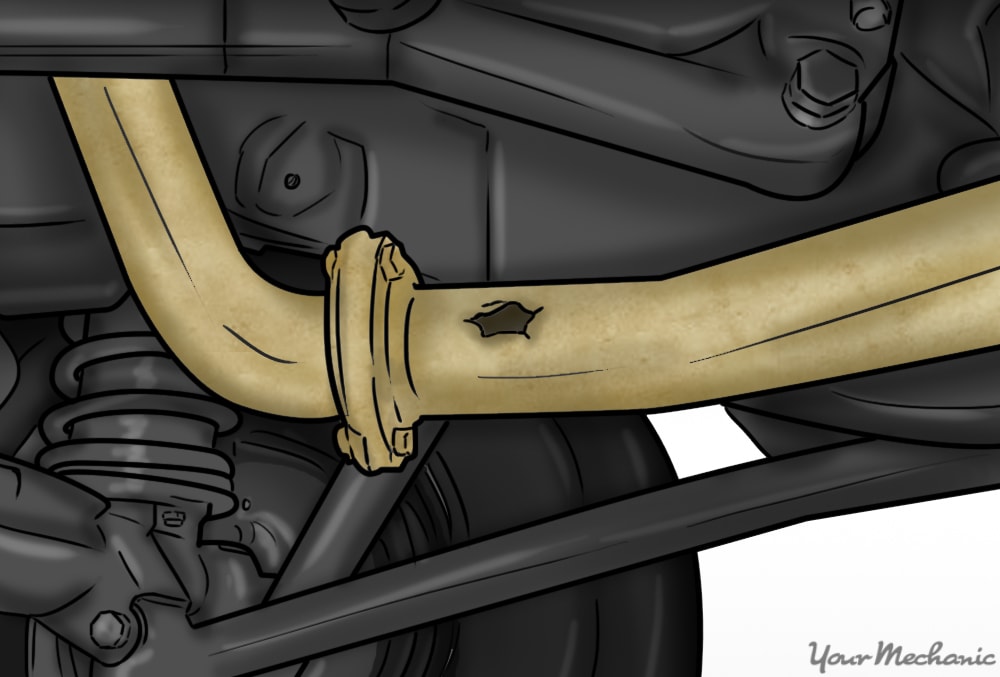
Step ii: Locate the exhaust leak on the vehicle. Put on safe glasses and slide under the vehicle to visually audit your exhaust system with a flashlight.
Oft, the damaged portion of the exhaust piping will be facing the ground due to the virtually exposure. In some cases, however, at that place can be holes and cracks on the top side of the exhaust, facing the underside of your vehicle.
If you are unable to discover impairment facing the basis, start the vehicle and heed for the frazzle leak. Use an inspection mirror to pinpoint the source of the leak.
- Tip: If you practice not accept a mirror, use your hand to experience for exhaust gases escaping the portion of the exhaust in question. Only accept care to go on your mitt in motion and do non directly touch the exhaust pipe.
This allows the surface to exist cleaned hands, every bit well as allowing the adhesive from the repair tape to stick to the exhaust.
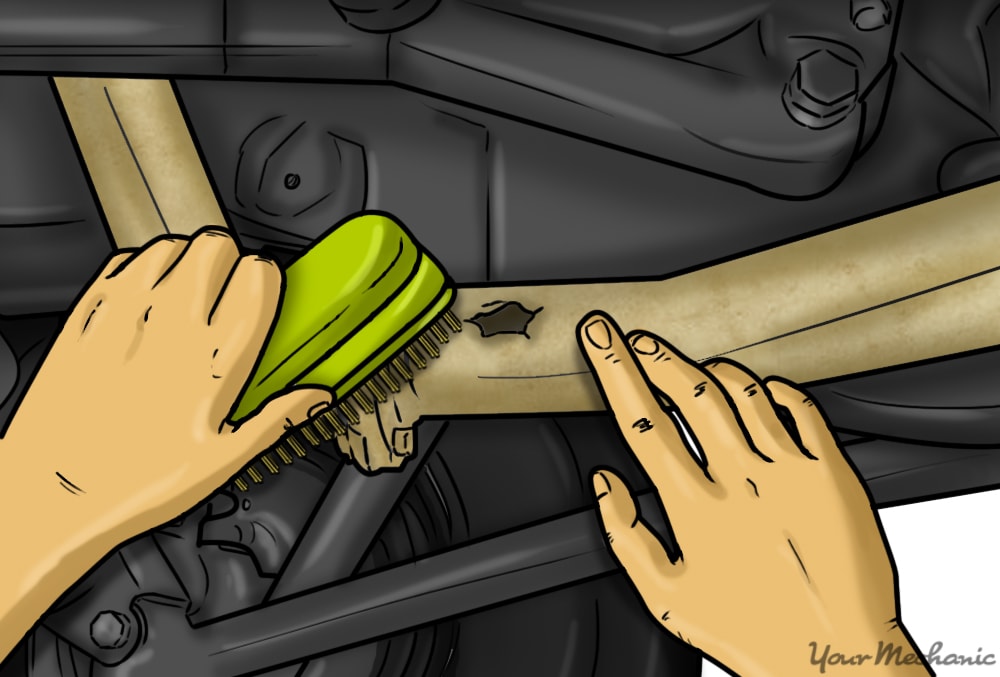
Stride iii: Prepare the frazzle surface for repair. One time the leak is discovered, the side by side stride is getting the exhaust piping warm, preferably over 80 degrees Fahrenheit.
Use safety gloves to protect your hands from the hot exhaust and use a wire brush to make clean the damaged area. Be certain to get all of the surface up to an inch by the damaged area.

Step 4: Encompass the pigsty with steel wool. Have a piece of steel wool and cover the damaged surface area of the exhaust pipe.
Footstep v: Apply repair tape to the damaged surface area. Get the repair tape and remove the backing to expose the sticky side. Carefully wrap it around the damaged expanse securing the steel wool to the exhaust pipe.
Footstep 6: Cut the empty soda can to fit around your exhaust pipage. Use the tin snips to cut the superlative and lesser off of your soda can and and then cut the tin can lengthwise, downward the center.
This will give you a squeamish size rectangular piece of aluminum with a built in bend to hands become around your exhaust pipe repair, covering the steel wool and repair tape.
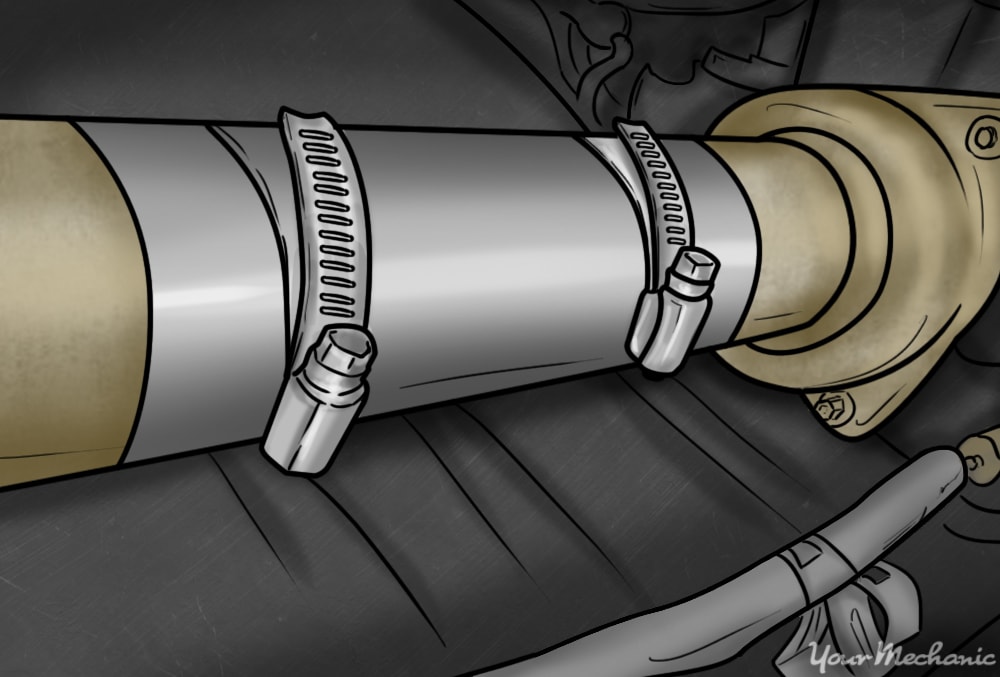
Step 7: Secure the soda can around the pipe. Have the hose clamps and utilize one at each finish of the soda tin can to secure it to the exhaust pipe.
Pace 8: Activate the agglutinative repair record. Start your vehicle let it idle for 15 minutes to allow the adhesive on the repair tape to actuate and adhere to the exhaust pipe.
- Tip: When exhaust pipe develops cracks or holes, it never happens the aforementioned way, so sometimes you may need to get a little creative with the way you apply the repair tape.
Stride nine: Test drive to bank check completion of repair. Use your floor jack to remove the rubber jack stands and lower your vehicle to the basis.
Outset the vehicle and have it for a test drive to ostend your repair is complete. Your engine should be tranquility, and the exhaust should sound smooth.
If everything sounds and feels groovy, then you can rest bodacious that the repair is consummate - and accept pride in the fact that you lot repaired your frazzle pipe on your ain. By tackling repairs like this on your own, you can not only save money and time, but proceeds hands on knowledge about your vehicle. If you are unable to complete the repair by yourself, one of our certified mechanics at YourMechanic will exist happy to come out to your location to replace your exhaust pipe.
The statements expressed above are but for informational purposes and should exist independently verified. Delight run into our terms of service for more details

How To Repair Muffler Pipe,
Source: https://www.yourmechanic.com/article/how-to-repair-an-exhaust-pipe-by-rocco-lovetere
Posted by: mackforculd.blogspot.com
0 Response to "How To Repair Muffler Pipe"
Post a Comment